


When you need to size a standpipe, start by following the rules in NFPA 14 and your local codes. You must pick the right system type, check flow and pressure needs, choose the correct pipe size, and account for friction and elevation. Each step helps you keep the system safe and reliable. Use careful planning to make sure your standpipe works when you need it most.
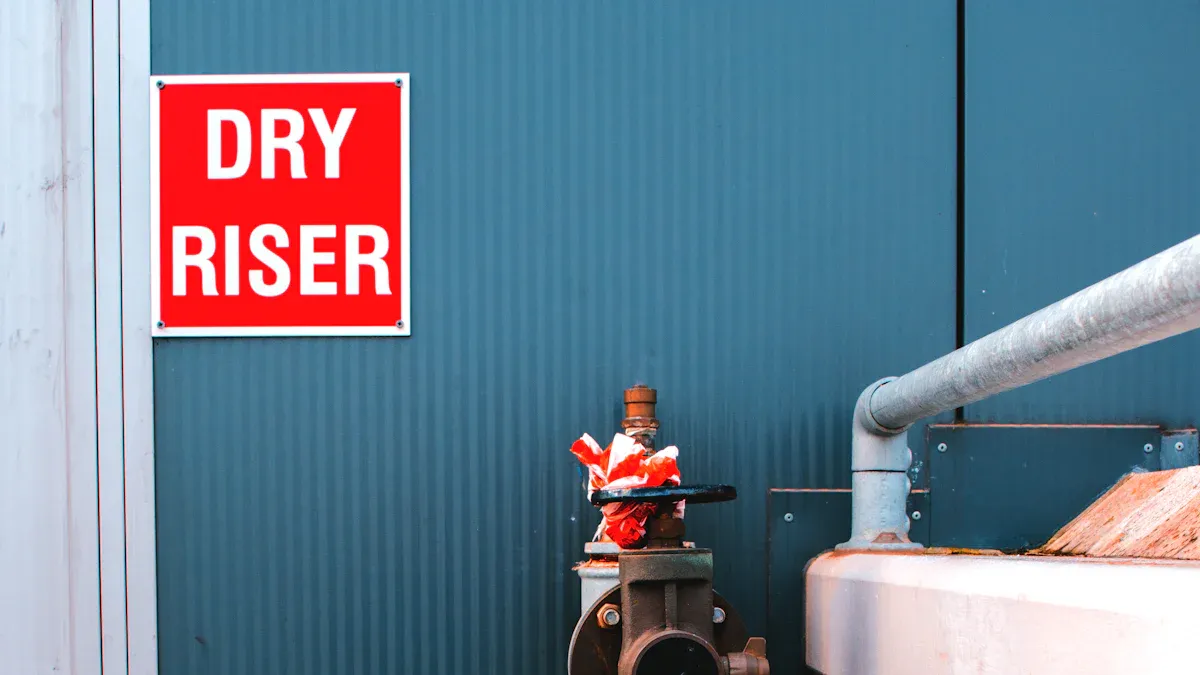
Learn about the types of standpipes. Class I is for firefighters. Class II is for trained people. Class III is for both groups. Pick the class that fits your building.
Find out the lowest flow rates needed. The first standpipe must flow at least 500 gpm. Each extra standpipe adds 250 gpm more.
Figure out the right pipe size. NFPA 14 gives the smallest sizes. Risers should be at least 4 inches wide. Smaller pipes can cause low water flow. They can also cause pressure problems.
Think about friction loss and height. Water pressure drops as it moves in pipes. Pressure also drops as water goes up tall buildings. Change your math to keep pressure strong at every outlet.
Always look at NFPA 14 and local rules first. Local codes may be different from NFPA rules. Talk to fire officials to avoid expensive errors.
It is important to know the standpipe classes before sizing a standpipe. Each class has a special job in fire protection. NFPA 14 lists three main classes. These classes have different hose connection sizes. They are made for different people to use. The table below shows the main differences:
Class Type | Hose Connection Size | Intended Use |
|---|---|---|
Class I | 2 ½ inch | Structural firefighting |
Class II | 1 ½ inch | Incipient fire control by trained occupants or fire brigade |
Class III | Combination of 2 ½ inch and 1 ½ inch | Structural firefighting and incipient fire control by trained occupants or fire brigade |
Class I systems use big hoses for firefighters. Class II systems use smaller hoses for people who work in the building or are trained. Class III systems have both hose sizes. This way, both firefighters and trained people can use them.
Tip: Always check which class your building needs before you do any math.
The kind of building and how people use it helps you pick the standpipe class. You need to look at how many stories the building has. You also need to check how high or low the building is from the ground. You should see if the building has a sprinkler system. The table below helps you match the building to the right standpipe class:
Condition | Standpipe Class |
|---|---|
4 or more stories above or below grade | Class III |
Highest story more than 30 feet above fire department access | Class III |
Lowest story more than 30 feet below fire department access | Class III |
Automatic sprinkler systems present | Class I (may replace Class III) |
If your building has four or more stories, you usually need a Class III system. If the highest or lowest story is more than 30 feet from fire department access, you also need Class III. If there is an automatic sprinkler system, you may use Class I instead. Knowing these rules helps you size a standpipe the right way for safety and to follow the rules.
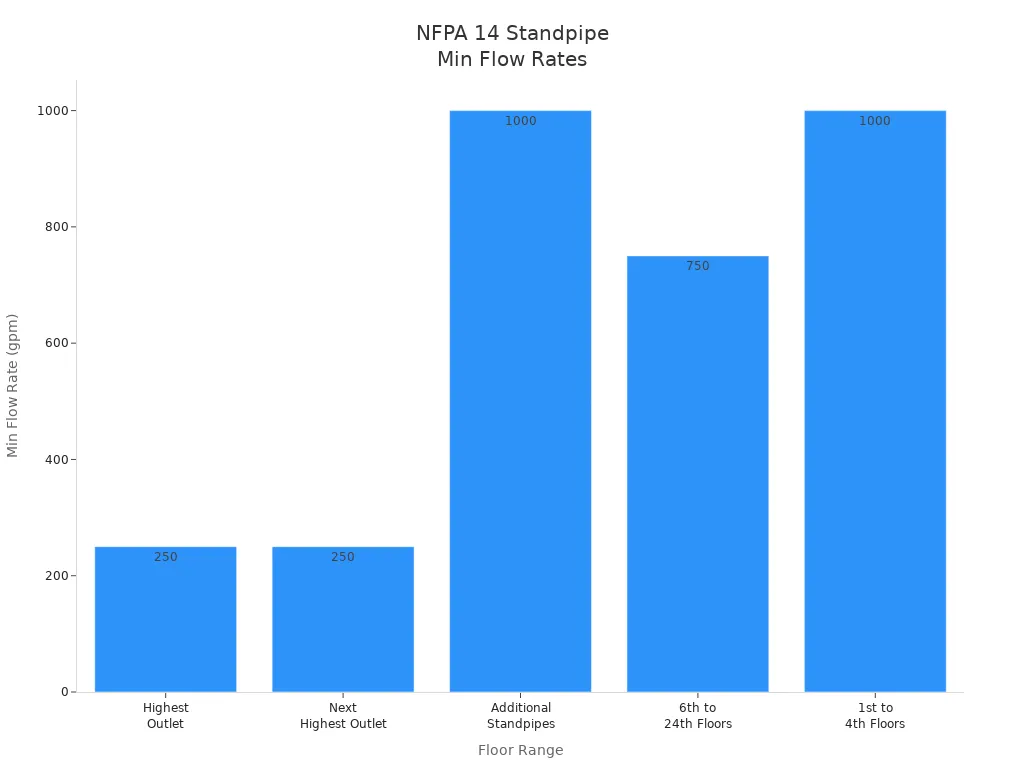
You must know the minimum flow rates before you size a standpipe. NFPA 14 sets clear rules for how much water must flow through each standpipe. The flow rate depends on the number of standpipes and the building’s height. The table below shows the minimum flow rates for different floor ranges:
Floor Range | Minimum Flow Rate (gpm) |
|---|---|
Highest Outlet | 250 |
Next Highest Outlet | 250 |
Additional Standpipes | 250 each, max 1000 gpm |
6th to 24th Floors | 750 gpm (2 standpipes) |
1st to 4th Floors | 1000 gpm (6 standpipes) |
You can also see the flow requirements in this chart:
When you check flow rates, remember these points:
The first standpipe must flow 500 gpm.
Each extra standpipe adds 250 gpm.
The total flow should not go over 1000 gpm for sprinklered buildings or 1250 gpm for non-sprinklered buildings.
You must verify flow from all standpipe locations at the same time.
You need enough pressure to move water to the highest hose connection. NFPA 14 says you must have at least 100 psi at the most remote hose outlet. In some sprinklered buildings, the minimum is 65 psi. As buildings get taller, you need more pressure to push water up. For every foot of elevation, you need an extra 0.433 psi. For example, a 150-foot building needs about 65 psi just to reach the top floor. A 400-foot building may need over 273 psi at the base. Always check these numbers when you size a standpipe to make sure water will reach every floor during a fire.
When you size a standpipe, you must start with the right pipe diameter. NFPA 14 sets clear rules for the minimum sizes. You need to check the type of system and the building’s needs. The table below shows the minimum pipe diameters for different standpipe components:
Component | Minimum Diameter |
|---|---|
Standpipe Risers | 4 inches (100 mm) |
Combined System | 6 inches (150 mm) |
Fully Sprinklered | 4 inches (100 mm) |
Branch Lines | 2.5 inches (65 mm) |
You can see these sizes in the chart below:

If you have a branch line, you must use a pipe at least 2.5 inches wide. If the branch line is longer than 40 feet, you need a control valve. This helps with maintenance and testing. Always check the minimum diameter before you move to the next step.
Tip: Using pipes smaller than the minimum size can cause low water flow and pressure problems. Always follow NFPA 14 rules.
You need to use hydraulic calculations to size a standpipe correctly. These calculations help you pick the right pipe size for the flow and pressure needed in your building. You must look at the water supply, the layout of the pipes, and the friction loss.
Here are the main steps you should follow:
Find out how much water you need to fight a fire. For most systems, you need 500 gallons per minute (gpm) for the first standpipe. Each extra standpipe adds 250 gpm.
Check if your water supply can give enough flow and pressure.
Draw the layout of your piping system. Mark all hose connections and branch lines.
Calculate friction loss for each pipe section. Use the Hazen-Williams formula or a similar method.
Add extra pressure for elevation. For every foot of height, you need about 0.433 psi more.
Make sure you have at least 100 psi at the most remote hose outlet.
You can use the table below to see the flow rates for fire department connections (FDC) in high-rise standpipe systems:
Standpipe System Type | Minimum Flow Rate (gpm) | Additional Flow Rate per Riser (gpm) | Maximum Flow Rate (gpm) |
|---|---|---|---|
Class I & III (1 riser) | 500 | 250 | 1000 (sprinklered) |
Class I & III (2 risers) | 750 | 250 | 1250 (non-sprinklered) |
Area > 80,000 sqft | 500 (2nd riser) | 250 (3rd riser) |
If your building is very large or has many risers, you must size the FDC inlet to handle high flow rates. This helps firefighters connect quickly and get enough water during an emergency.
Note: Hydraulic calculations can be complex. You may need special software or help from a fire protection engineer. Always double-check your numbers to make sure your standpipe will work when needed.
When you size a standpipe, you must follow each step carefully. Start with the minimum pipe diameter. Use hydraulic calculations to check flow and pressure. Make sure your FDC can handle the required flow. This process helps you build a safe and reliable system.
You need to know about friction loss when sizing a standpipe. Water loses pressure as it moves through pipes because of friction. The amount of loss depends on the pipe’s diameter, length, and material. Bigger pipes help lower friction loss. Smaller pipes make water move faster, which causes more friction loss.
The pipe’s material is important too. Metal pipes can get rusty and build up scale over time. This makes the inside rougher and increases friction loss. You might need a bigger metal pipe to keep the system working well. CPVC pipes stay smooth for many years. They have a high Hazen-Williams C-Factor, so water flows with less resistance. You can use a smaller CPVC pipe and still get good water flow.
Tip: Always look at the manufacturer’s Hazen-Williams C-Factor. This number helps you figure out friction loss better.
To find friction loss, use the Hazen-Williams formula. Many designers use charts or computer programs to help with this step. Always include friction loss in your hydraulic calculations. This makes sure every hose outlet gets enough pressure.
You need to adjust for elevation when designing a standpipe in a tall building. Water pressure drops as it goes up each floor. For every foot higher, you lose about 0.433 psi of pressure.
You can use these common ways to adjust for elevation:
Use only regular hose valves in your standpipe setup.
Set field adjustable pressure reducing valves (PRVs) to the highest pressure allowed by the manufacturer. A Registered Design Professional (RDP) should check this setting.
Make sure factory-set PRVs are set for the right pressure on each floor. The RDP should check this too.
Keep clear signs at fire department connections. Change the signs if pressure needs change during building work.
If you follow these steps, you help firefighters get enough pressure at every hose outlet, even on the top floor.
You have to follow rules when you size a standpipe. NFPA 14 gives the main rules for design and setup. Local fire codes might have extra things you must do. Always look at both sets of rules before you begin.
NFPA 14 says you must:
Put standpipe systems in buildings with more than four stories or special uses.
Place hose connections at exits and stairs. These must fit fire department hoses and be easy to use.
Check and test standpipe systems often. Follow the manufacturer’s steps for care.
Local codes can change the smallest pipe size, pressure, and flow rates. You should compare NFPA 14 with your local fire code. The table below shows some ways they can be different:
Requirement Type | NFPA 14 Requirements | Local Fire Code Variations |
|---|---|---|
Minimum Size | 4 inches (minimum) | Varies by locality |
Combined Standpipe Size | 6 inches (partially sprinklered), 4 inches (fully sprinklered) | Varies by locality |
Minimum Pressure | 100 psi (automatic/manual) | Varies by locality |
Minimum Flow Rate | 500 gpm (most remote outlet) | Varies by locality |
International codes like the IBC also have rules for standpipe systems. These codes might use different words or have less detail. Always check which code you need to use for your building.
Tip: Talk to your local fire marshal before you size a standpipe. This can help you avoid expensive mistakes.
You can make mistakes if you do not follow the rules or skip steps. Some mistakes happen a lot. You should know about these so you can avoid them.
Common mistakes are:
Using pipes that are too small. This makes water flow and pressure too low.
Not thinking about friction loss. Long or thin pipes lose pressure as water moves.
Forgetting about elevation changes. Buildings on hills or with many floors need more pressure to reach the top.
Putting hose connections in hard places to reach. Firefighters need to get to them fast in emergencies.
Not checking the system often. Pipes can rust or clog, which makes the system work worse.
The table below shows how forgetting friction loss and elevation can cause problems:
Factor | Description |
|---|---|
Elevation difference | Buildings on hills or high ground need more pressure for good water flow. |
Friction losses | Long or small pipes can cause big pressure drops, which hurts flow rate. |
You must check every part of your design. Always use the right pipe size and think about friction and elevation. Test your system often to keep it ready for emergencies.
⚠️ Alert: If you size a standpipe without checking all the rules and math, you might build a system that does not work when you need it most.
You need to follow every step when sizing a standpipe. Always look at NFPA 14 and your local codes. Good planning keeps your system safe and ready to use. Doing regular checks helps your standpipe last longer and work well in emergencies. New tools, like smart sensors, can help you watch your system more easily. If you are not sure what to do, ask fire protection experts for help. They can help you follow the rules, fix design issues, and share important updates. Fire department rules might change if your building is tall or has many people, so always ask local officials.
Criteria for Standpipe System Installation | Description |
|---|---|
Building Height | You need a standpipe if the top floor is more than 30 feet above where the fire department can reach. |
Occupancy Load | You need a standpipe if the building is for more than 1,000 people. |
Accessibility | Local rules may ask for more hose stations. |
Other Specific Uses | This includes places like underground buildings, marinas, and helistops. |
NFPA 14 says you must use at least a 4-inch pipe for standpipe risers. Branch lines need at least 2.5 inches. Always check your local code for any changes.
You use the Hazen-Williams formula to find friction loss. Many people use charts or software to make this step easier. Always include friction loss in your hydraulic calculations.
Water loses pressure as it moves up. For every foot higher, you lose about 0.433 psi. You must add extra pressure to reach the top floor with enough force.
Tip: Watch out for these errors:
Using pipes that are too small
Forgetting friction loss
Ignoring elevation changes
Placing hose outlets in hard-to-reach spots